


Welcome to this Databeat Academy video. In this video I will show you how you can show dashboards with KPI on your public displays.
We are going to use Databox which is a powerful tool, in which you can create your own fully customizable dashboards.
As side note, Databox freemium model offers up to 3 dashboards for free. You can also go over to a paid subscription of course.
Another thing worth mentioning is that you will need newer models of public displays to support the showing of the dashboards. You would also need to have admin privileges to the different data sources that you wish to use.
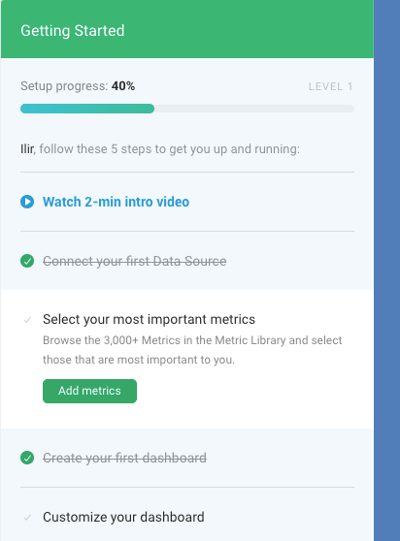
Step one - Account and Setup
- Create a free Databox account by clicking on this link.
- Set up your account based on the instructions that you are given.
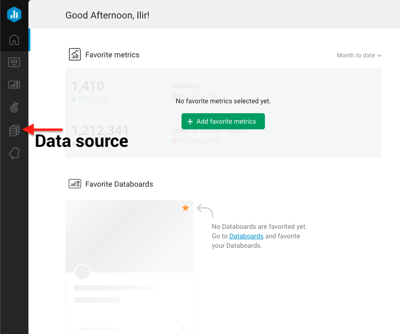
Step two - Connect Data source and set up the dashboard.
Note that you need to have admin rights to connect with data sources. If you don't have that, ask the administrator to get the rights.
- Go to: data sources to connect one or many data sources you wish you use.
- Click on "Connect Now"

- Choose your data source in the given list. You can also use the search function if you have the search function.
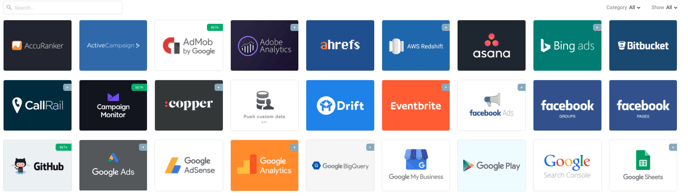
- Click on "Connect now". Note that you can also ask a teammate to connect it for you if you don't have the admin rights.
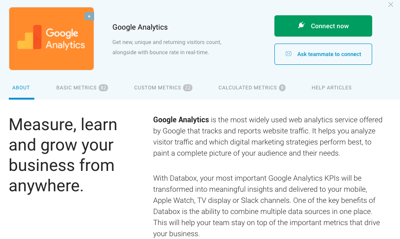
After you have connected your data source, a new window will prompt. Here you will have to choose if you want to create own metrics or use a template from the Databox template. I would recommend using a premade template if you are new to dashboards and digital signage.
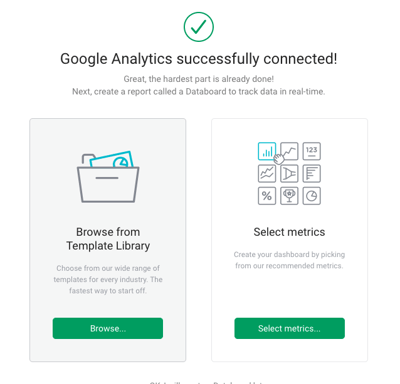
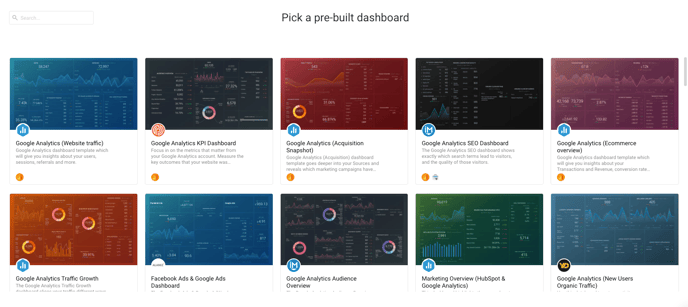
- Select your dashboard from the given Databox templates.
Step three - Sharing your dashboard
After you have set up your data source and first dashboard. You will need to get the URL which we need to publish in DatabeatOMNI in order to show towards all the screens.
- Click on "Share"
- Copy the URL that is provided
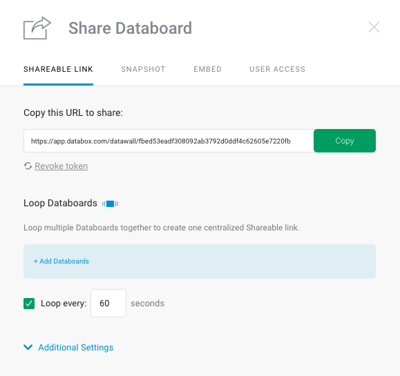
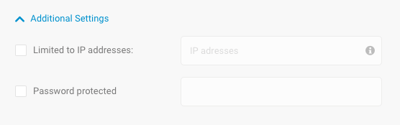
- On a side note: if you have a very strict and rigid network, you can set the desired IP address.
Step four - Publishing your dashboard in DatabeatOMNI
Now we are in DatabeatOMNI. The first thing that we need to do, is to create a new channel, and you can use a preexisting channel if you wish.
- Under the "Media" tab go to "Publish"
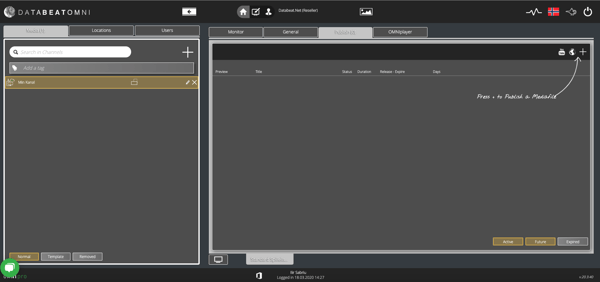
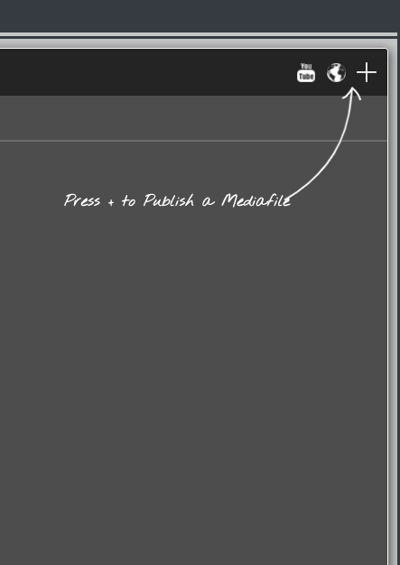
- First, we have to publish a piece of content, since the dashboard is an overlay.
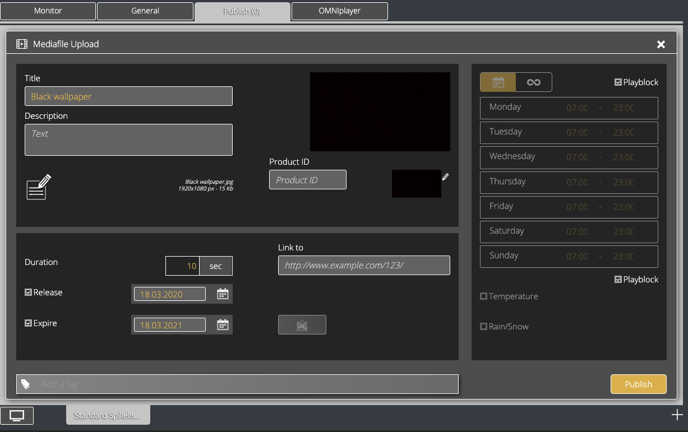
- Upload any type of content that you wish. In this case, I have uploaded just a black screen. When you have done that click on "publish."
- Then, now we will go to "Screen Designer" You will find button on the top of the page.
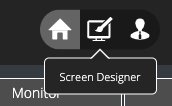
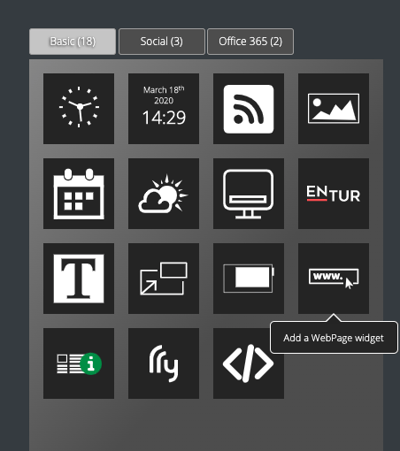
- We are now in "Screen Designer". The first thing that we need to do is to add a "Webpage widget" Drag and drop the webpage widget onto the screen.
Right away when you have dropped the widget onto the screen, a new screen will prompt. You will need to paste the URL that was taken from Databox. Then you click save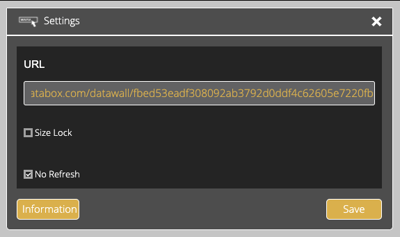
Adjust the size of the container to fit the screen or any other size you wish. In this example, I have adjusted the dashboard edge to edge. When you have done that, click on "Publish" to save your screen design.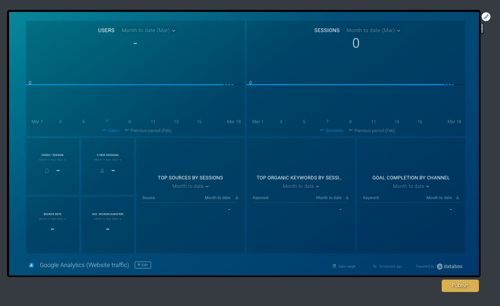
After you have published, you can go back home and get a preview of the dashboard and it will soon show on all your screens which have subscribed to the channel.


.png)