


This step-by-step guide will walk you through uploading, scheduling, and publishing content to your digital signage with DatabeatOMNI. Thankfully, it couldn’t be any easier.
Step 1: Create a New Channel
Once you’ve logged into DatabeatOMNI, the first thing you need to do is create a new channel. To do this, click the ‘+’ icon.
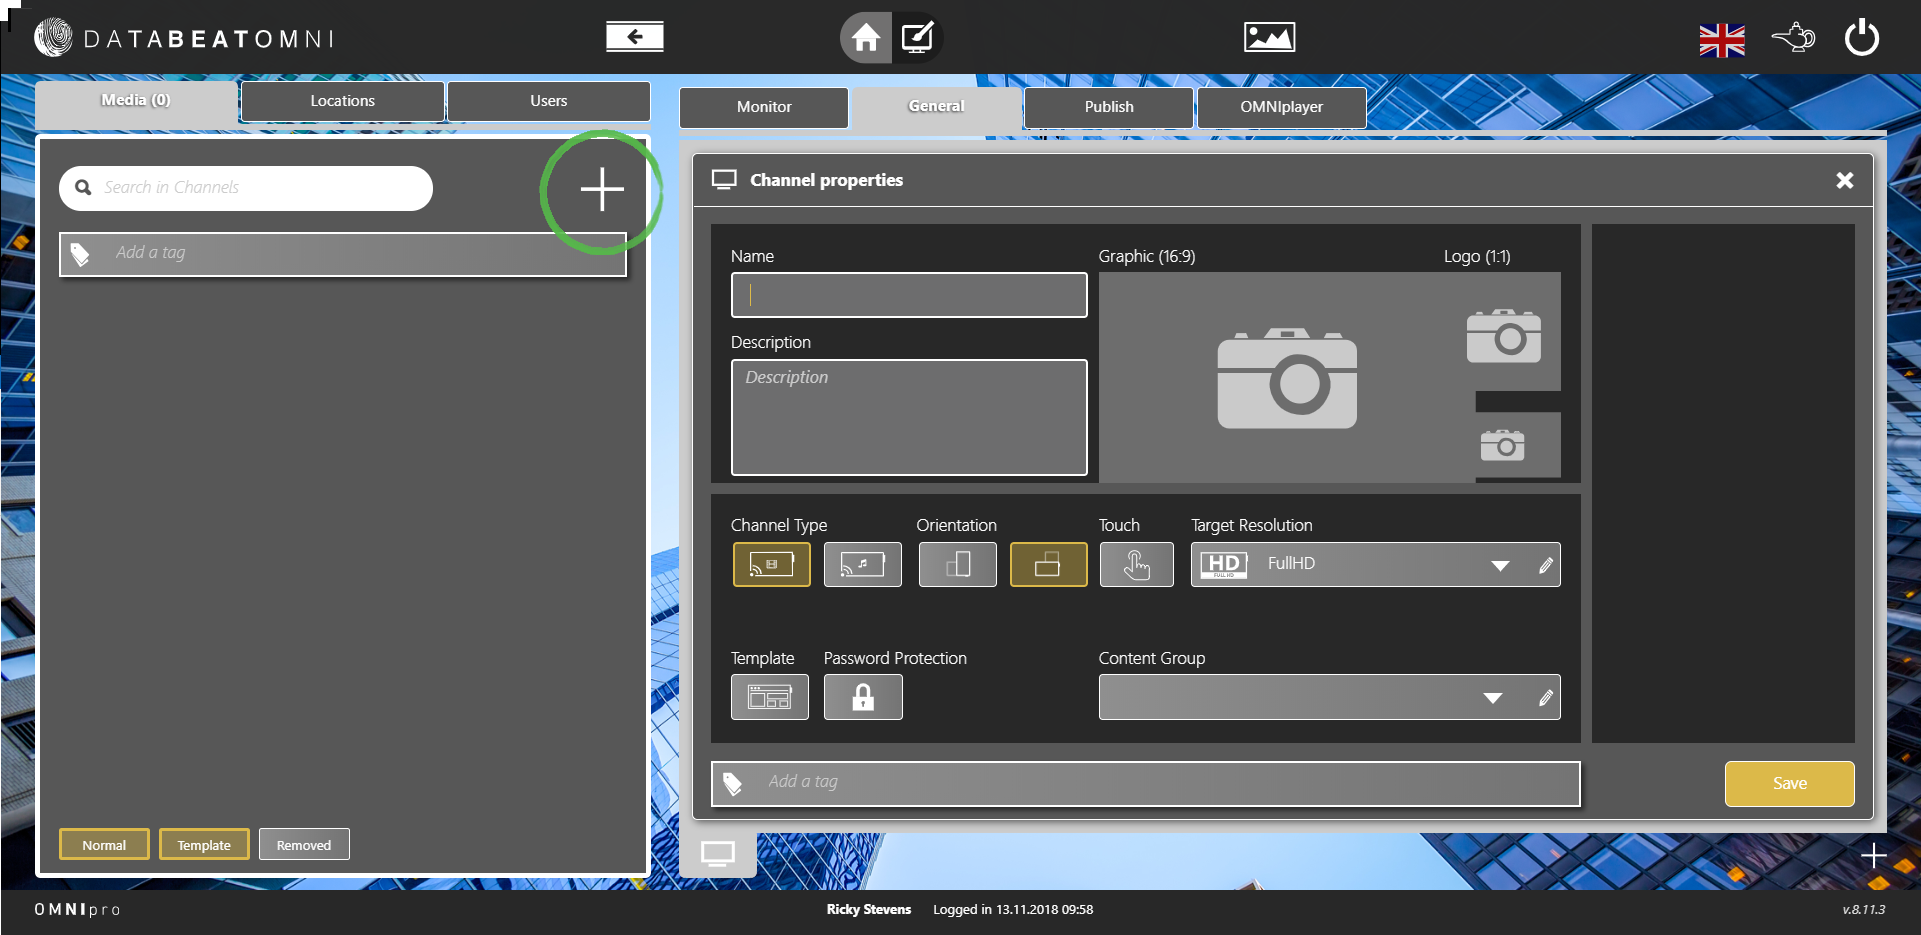
A tab labelled ‘General’ will appear on the right side of the screen. From here, you can give your new channel a name and description, choose screen orientation, and set screen resolution. Don’t worry about adding graphics or logos just yet. When you’re done, click ‘Save’.
Step 2: Let’s Add Some Content
Next, it’s time to add some content. Click the ‘Publish’ tab to the right of the ‘General’ tab. Then, click the ‘+’ icon in the top right-hand corner.

This will open up your PC’s file system where you can search for your desired content. Digital signage content can be in a JPEG, PNG, or PDF format for static media, or an MP4 file for video. Once you’ve found the file, double-click to open it in DatabeatOMNI.
Step 3: Plan When to Display Your Content
Once you’ve opened your file, you can give your content a title, description, and set the amount of time it'll stay displayed on your digital signage.
You can also start using some of DatabeatOMNI’s more advanced features.
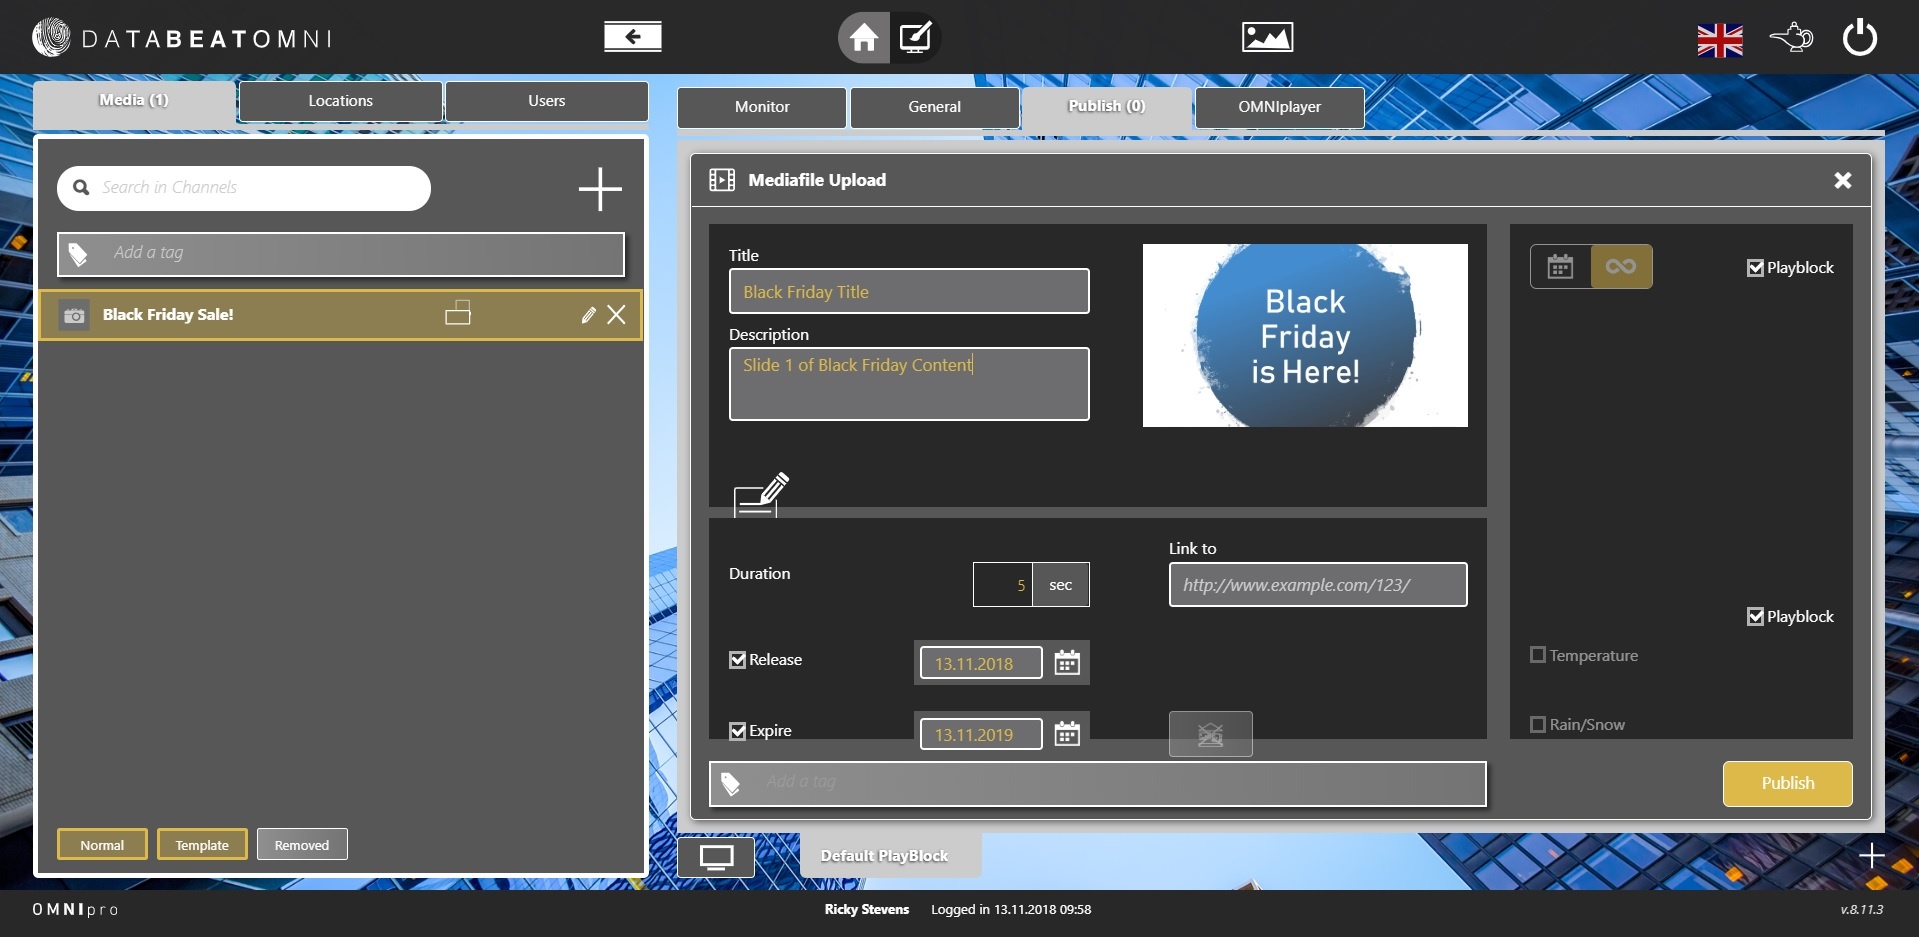
For demonstration purposes, we’ve created some content which promotes a tech retailer’s Black Friday deals. In this scenario, we only want this content to be shown over Black Friday weekend. You can adjust the ‘Release’ and ‘Expire’ dates, which can be found just under the ‘Duration’ setting, to control when content will start being displayed and when it will stop.
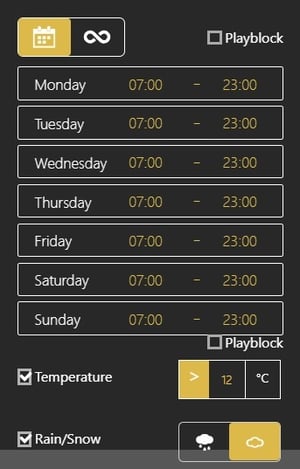
If you want even more control over when your content is displayed, untick the 'Playblock' check boxes on the right-hand side of the screen.
This will give you the ability to set times for your displays to come on and turn off, saving you and your team time and effort, and helping to save the environment.
You can also adjust your content based on weather and temperature. This is a great feature for cafes, for example, who could promote their hot chocolates when it’s cold, and their ice-creams when the sun’s out.
Experiment with your choice of content and when you display it to really engage your audience.
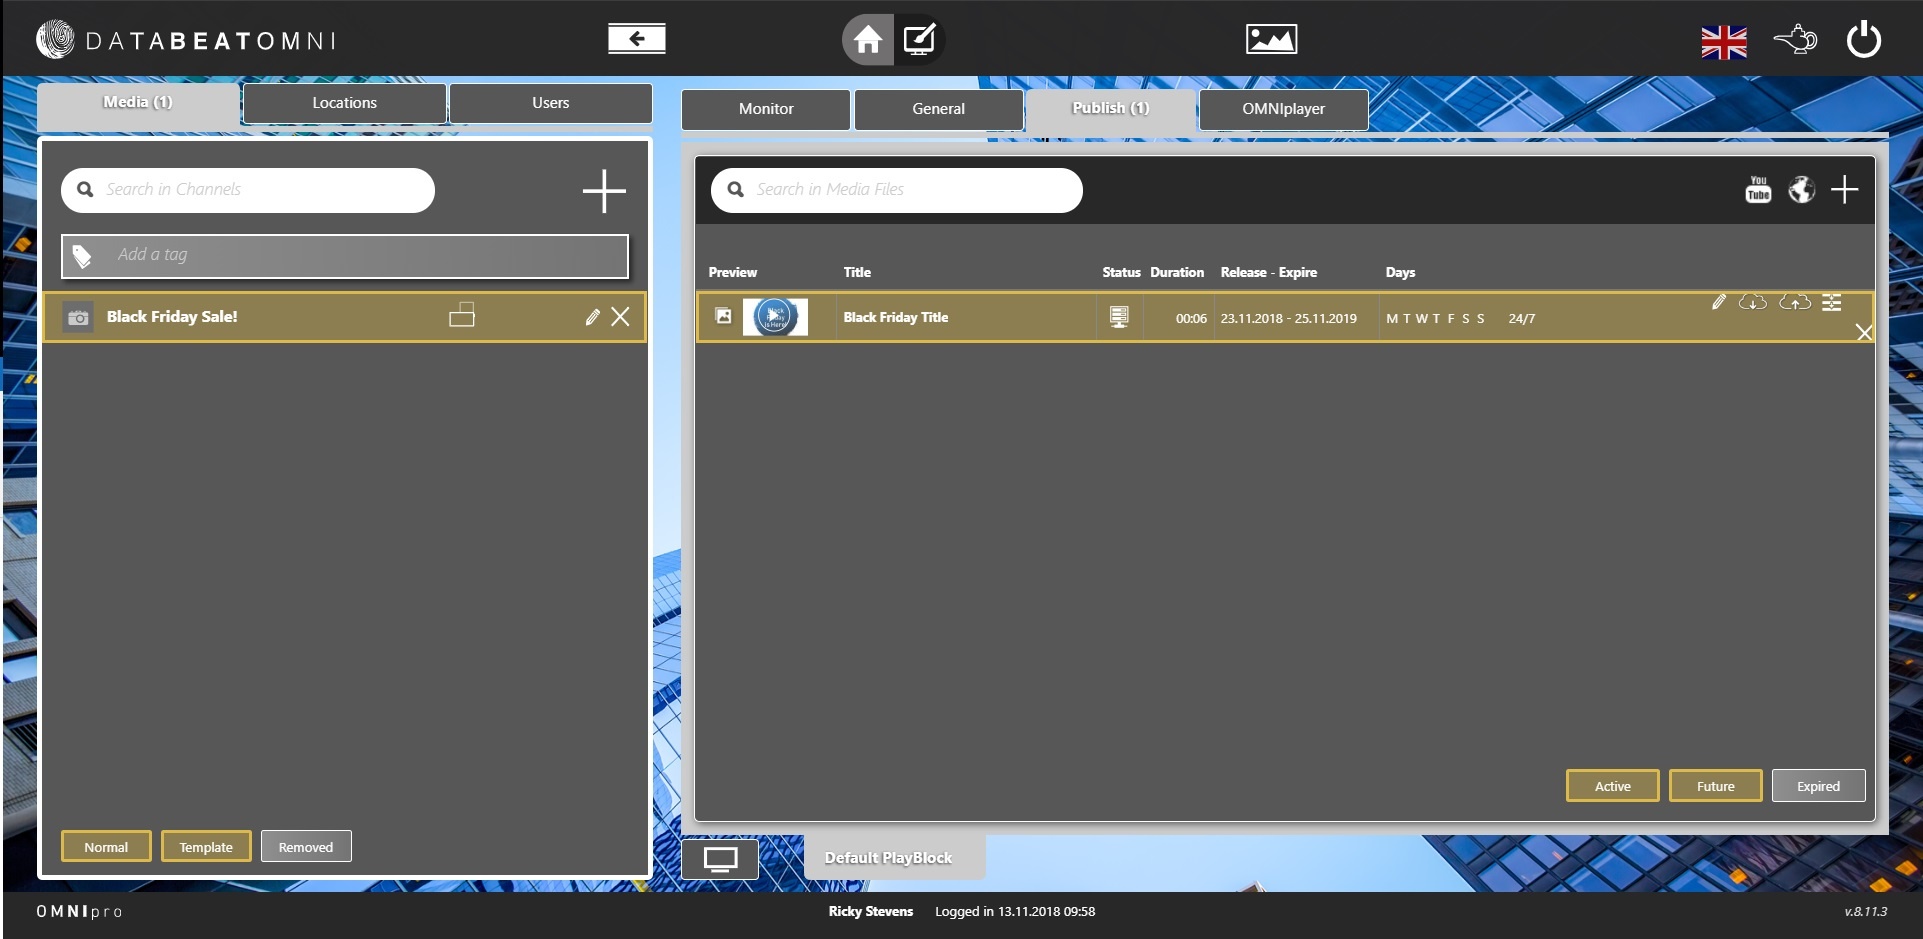
When you’re happy with these settings, click the ‘Publish’ button. Your screen should look something like this:
You can continue repeat steps 1 and 2 as many times as necessary to create your content campaign.
Step 4: Review Your Design and Publish
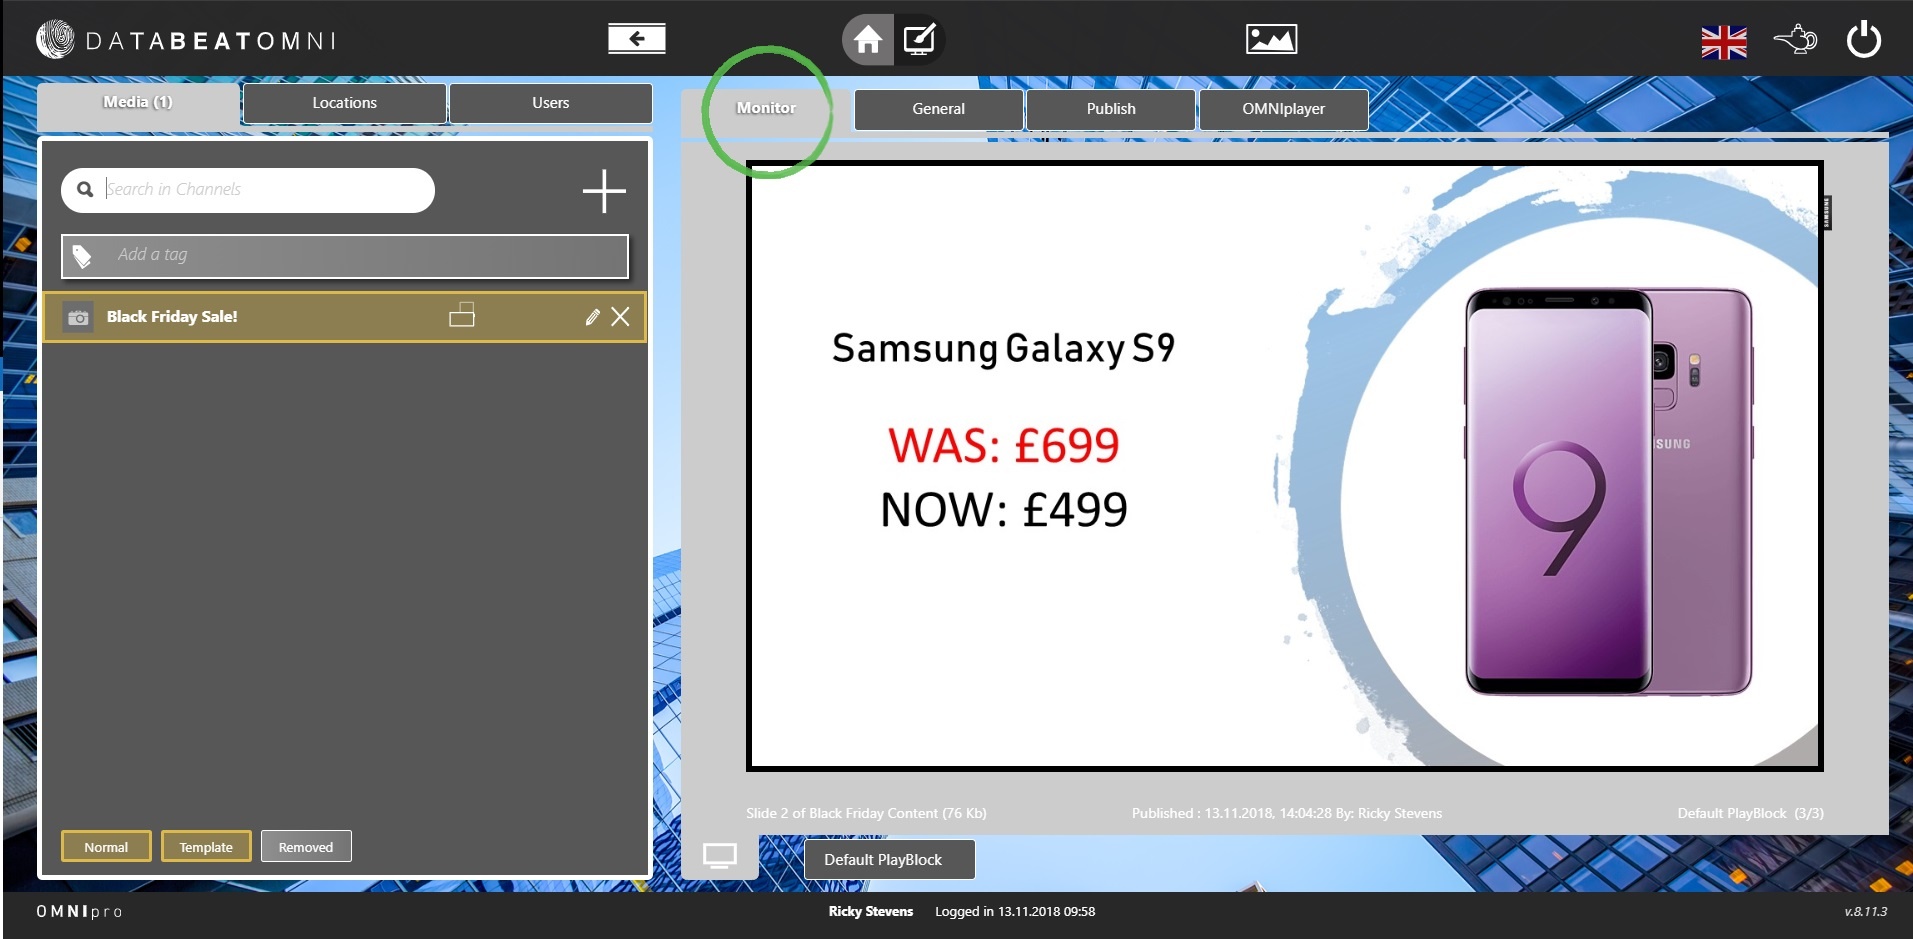
Once all your content has been uploaded, click on the ‘Monitor’ tab to get a preview of how your content will look on your digital screens.
When you’re happy with how it looks, it’s time to click on the ‘OMNIplayer’ tab.
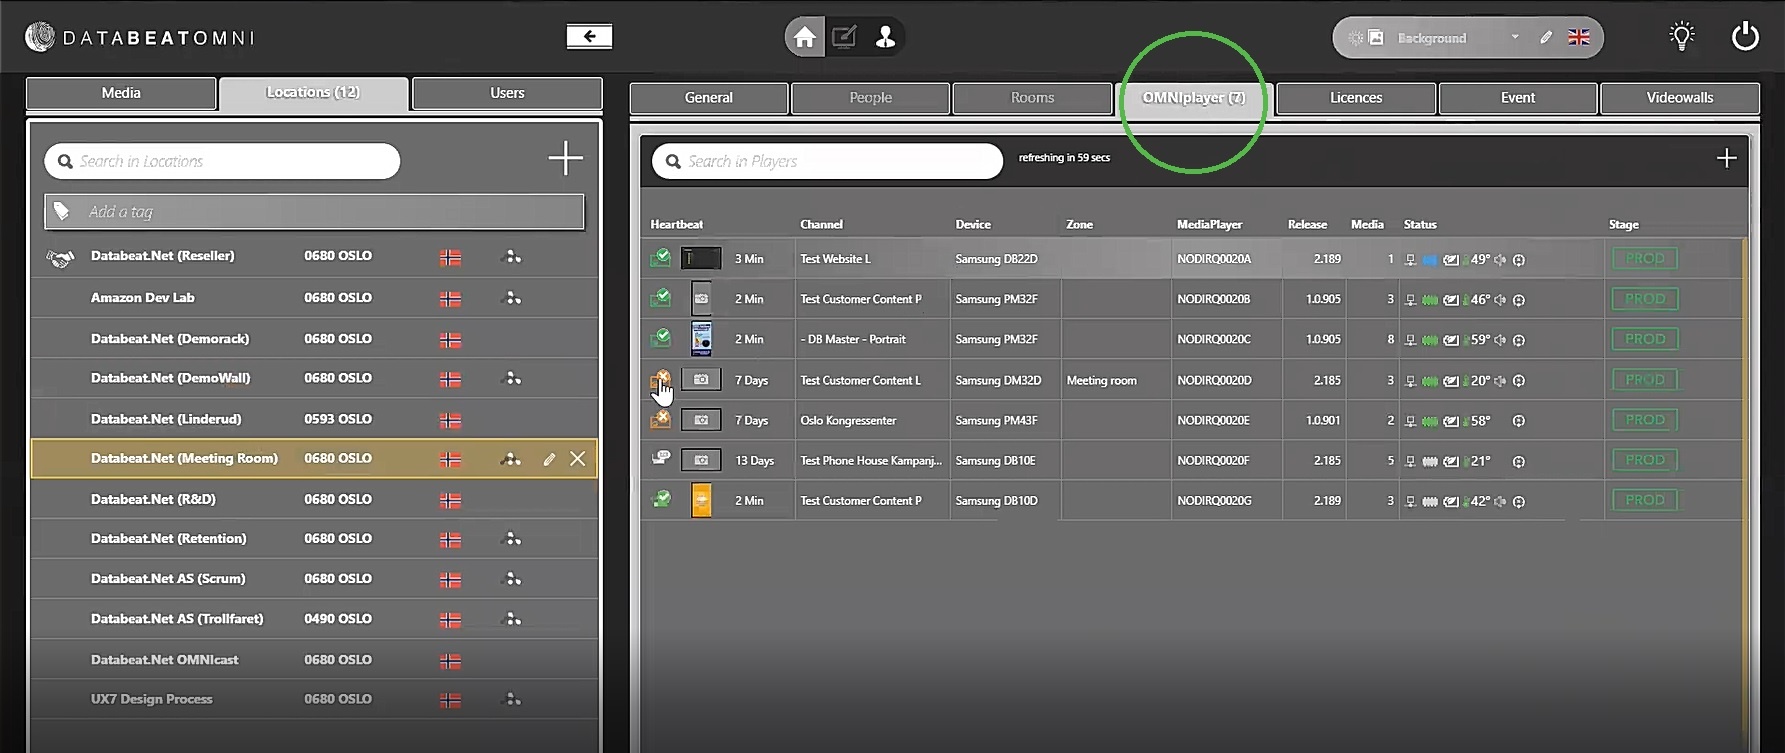
This will show you the list of digital displays you currently have access to. Click on the display you want to cast your content to, and, just like that, your content will appear on that screen. We told you it was easy!
Bonus Step: Add Dynamic Widgets
One of DatabeatOMNI's coolest features is its ability to apply live widgets on top of your content. Just like uploading graphics, it's really easy to do.
To get started, upload a piece of content following steps 2 and 3 above. Once done, click the 'Screen Designer' icon at the top of the page.
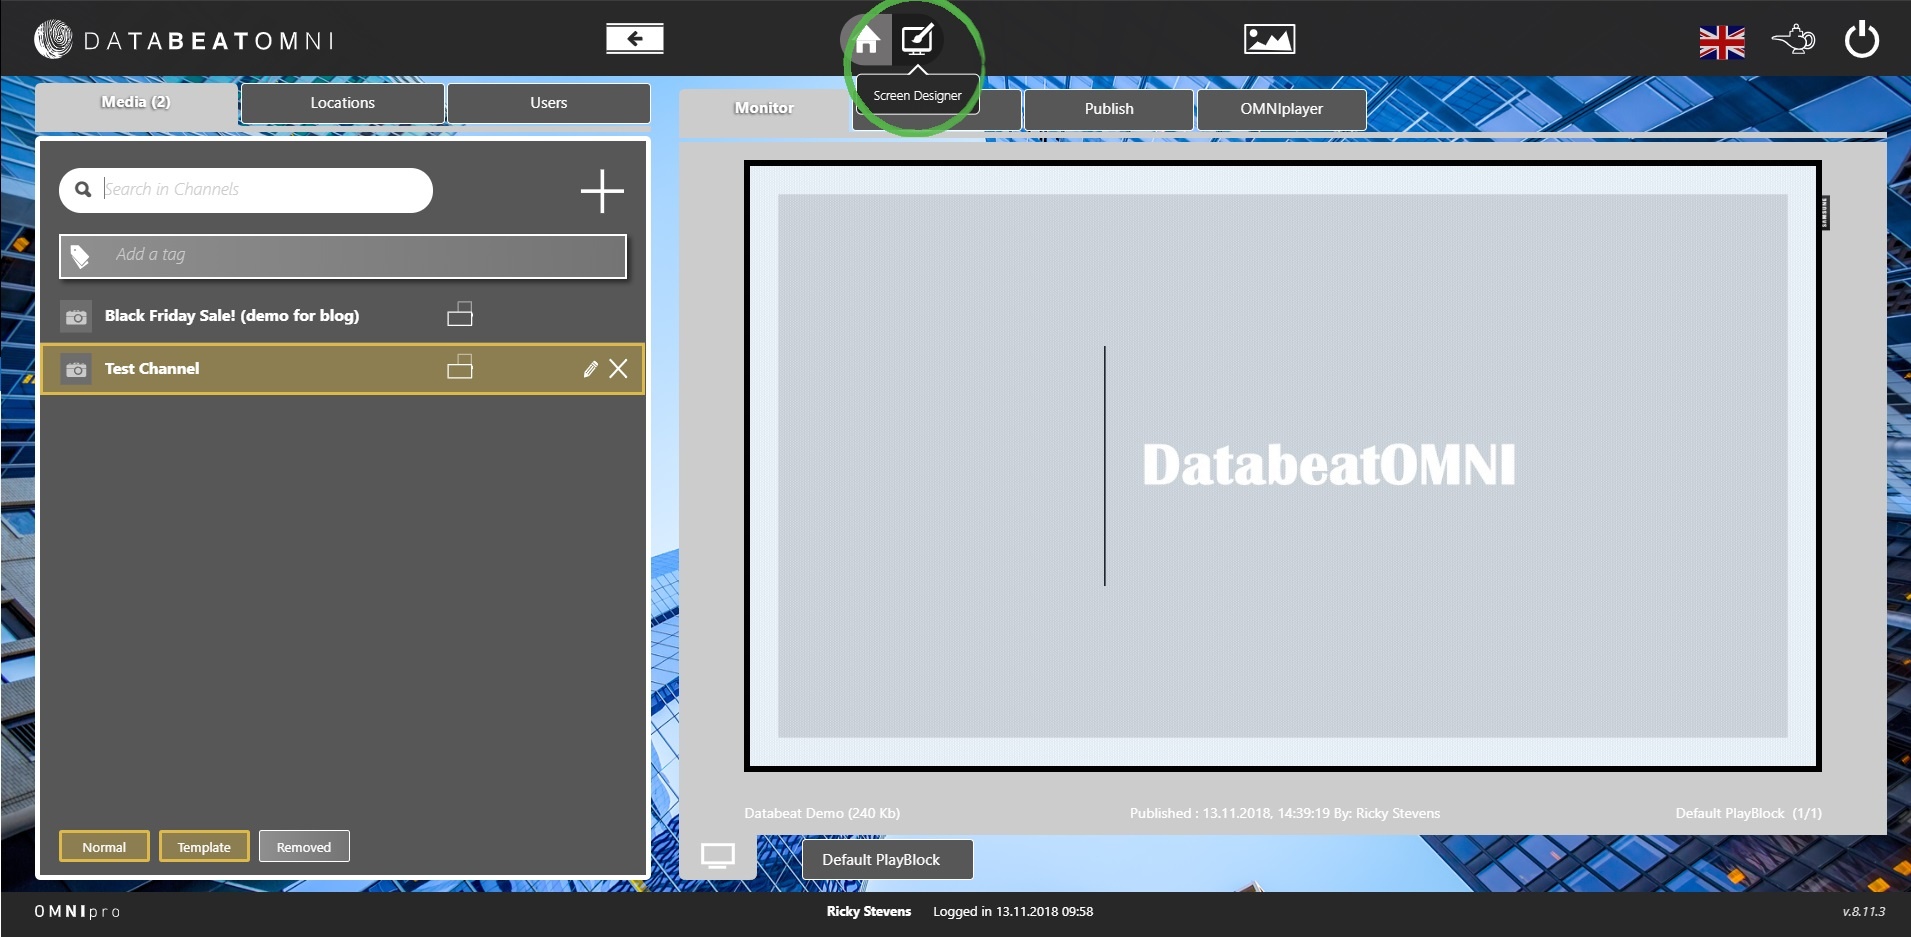
This will pull up a wide-range of widget options on the left-hand side of the screen. Simply drag and drop your chosen widget onto your content and it will appear.
You can customise these widgets by clicking on the small icons next to them. The red arrows allow you to adjust the size, while clicking the paintbrush gives you colour and style options. Play around with the placement and appearance of your widgets to achieve the look you're after.
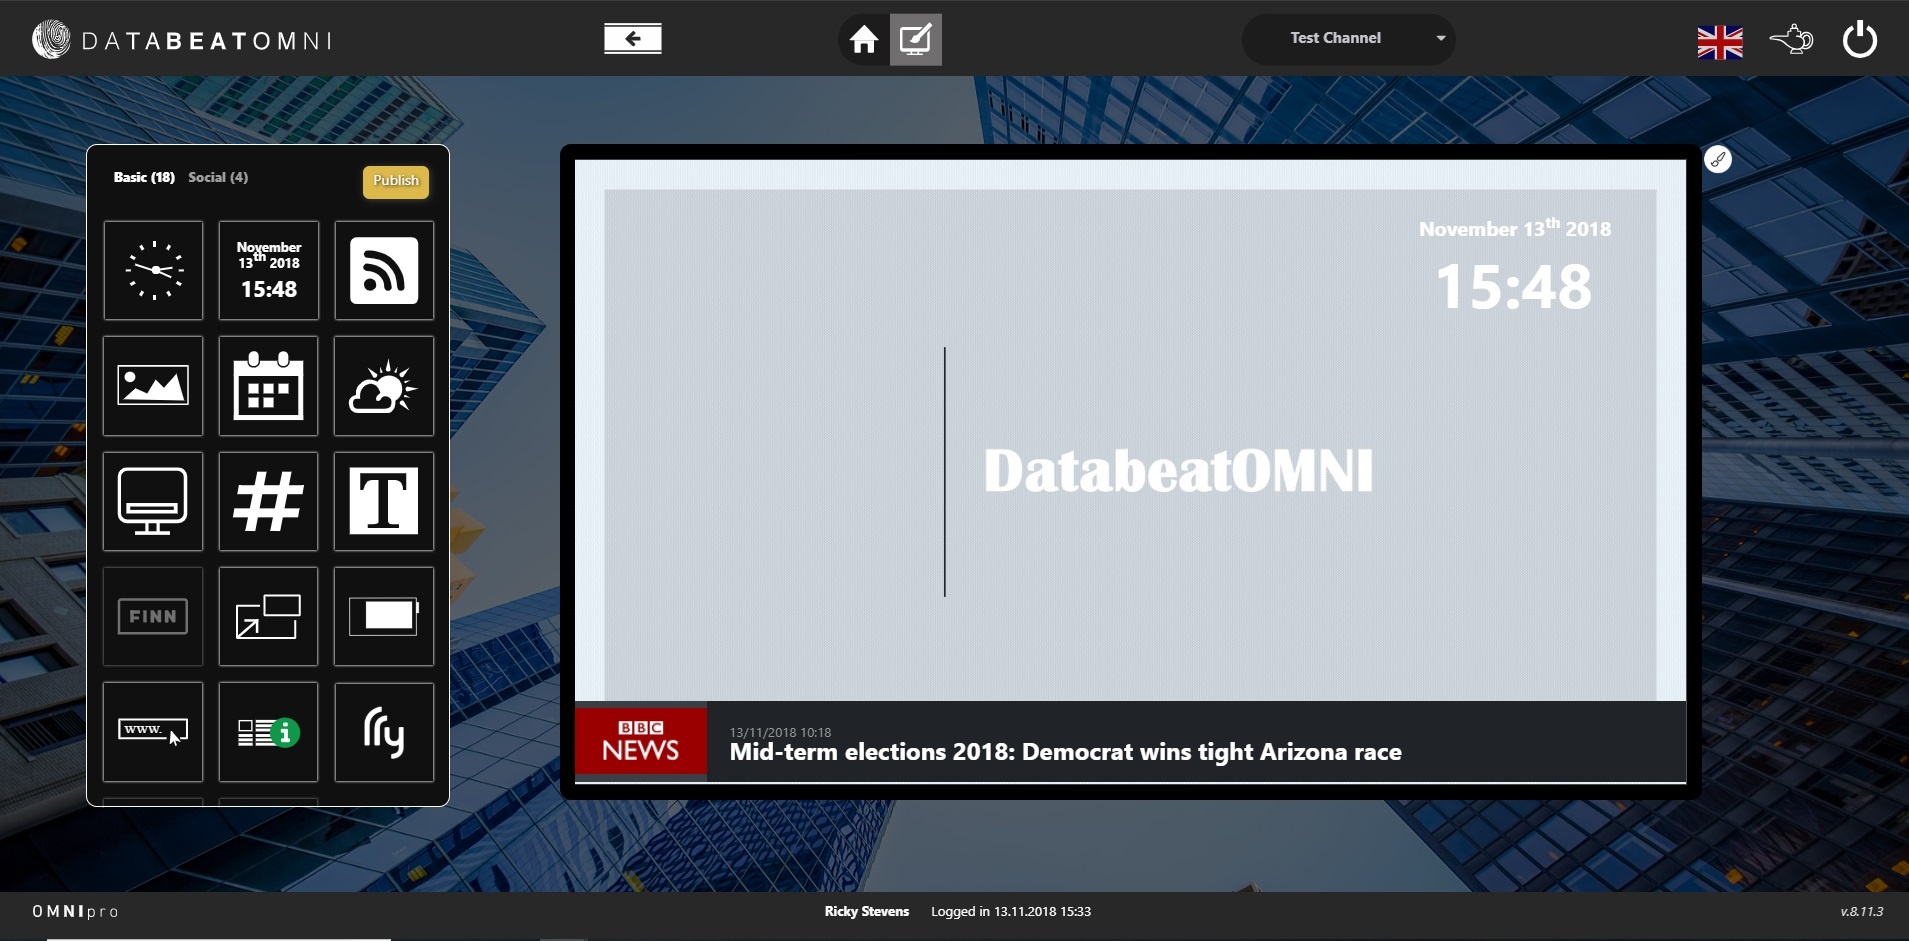
In the example above, you can see that we've added a clock and date widget in the top corner of our content and placed a rolling BBC news feed along the bottom.
These widgets are fantastic for digital displays positioned in reception areas and workplaces. Viken Forest, for instance, use digital signage and DatabeatOMNI's widgets to keep their employees up-to-date about important company events.
So, there you have it. Uploading, planning, and displaying your content with DatabeatOMNI really is that straight forward.
If you have any questions, feel free to contact us – we'll be more than happy to answer them. In the meantime, why not check out our top tips for creating content that will captivate audiences?


.png)